Introducing “B.Art”
We love to entertain in a big way, and Sue loves planning and preparing “Big Night” style dinners. For many years we put together a special “Valentine’s Day Dinner”, with 4 to 6 exceptional guests, and many courses over many hours. Then we got this B.A.B. project, which kinda put those on hold. Sue said it was time to revive that “V.D.D.” tradition; I agreed.
In the past, each dinner had a “theme”, so one evening we were noodling on possible ideas, Sue said she has been thinking of “Transformations” as a theme – taking ingredients and turning them into something unexpected. Sounded like a lot of possibilities. In the past, another component of V.D.D. was that there was a keepsake, take-home or other kind of memento for the guests, and our conversation naturally shifted to how “Transformations” could be woven into that keepsake.
It’s my favorite form of collaborating: where ideas bounce all over the place, and the creative energy builds on top of each idea, so I don’t remember who said what when, but what evolved was the idea of taking old parts or pieces of the Big Ass Building and transforming them into something beautiful (or at least cool). I’ve always wanted to take our old pipes & shit and make interesting things from them, and this was the perfect opportunity to do it.
That’s when I decided that I will make multiple series of these things, sculptures, or who-knows-what, and they will be named “B.Art” – short for “BAB Art”. (Or if you didn’t know this already, “Big Ass Building Art”, as in, art made from things that were once part of or attached to our Big Ass Building.)
I knew this would be a much larger effort than previous V.D.D. keepsakes, but I really felt it was appropriate and I loved the idea of kicking off the new B.Art venture with this special occasion.
The first step was to gather pieces, which was kinda fun but pretty grungy. I grabbed a five-gallon bucket and a flashlight and headed straight to the basement. (Hmmm… seems like this isn’t the first we’ve heard of “basement and a bucket” – Silence of the Lambs anyone?) I also checked the scrap pile of pipe that we’d cut out already, like the stuff I cut out of the Kodak Room a couple years ago.
After several trips, I’d built up a big pile of rusty metal on one of my workbenches.

Everything is nearly the same color: rust.
There were lots of valves, pipe joints and various lengths and diameters of pipes. There were some interesting parts I found in the south half of the boiler room that I never figured out what they were – (in the bottom right of the photo above) – since it looked like something rested in the slots, I just started referring to them as “shoes”; they were rustic old cast iron pieces and I really like their shape. I had to use them somehow.
We have many unexplored areas in our basement. It’s not that we haven’t been in the rooms, it’s just that we haven’t dug around or cleaned or straightened anything in the “spooky scary” rooms that don’t have any lighting – the old boiler room, the pre-boiler room, and the “tunnel” room. So there’s crap in those places that have half a century of dust and debris on them. And now I was digging around in them for scrap.
In the “pre-boiler” room, I found a heavy door weight sitting on top of what looked like an old pot belly stove – guessing it was meant to bring some heat to the workers down here. The weight looked useful so I put it in my bucket. But then I took it right out because it was so heavy.
Realizing we’ve owned BAB for 5-1/2 years now, and neither of us have ever really checked out this old stove, I spent a little more time poking around.

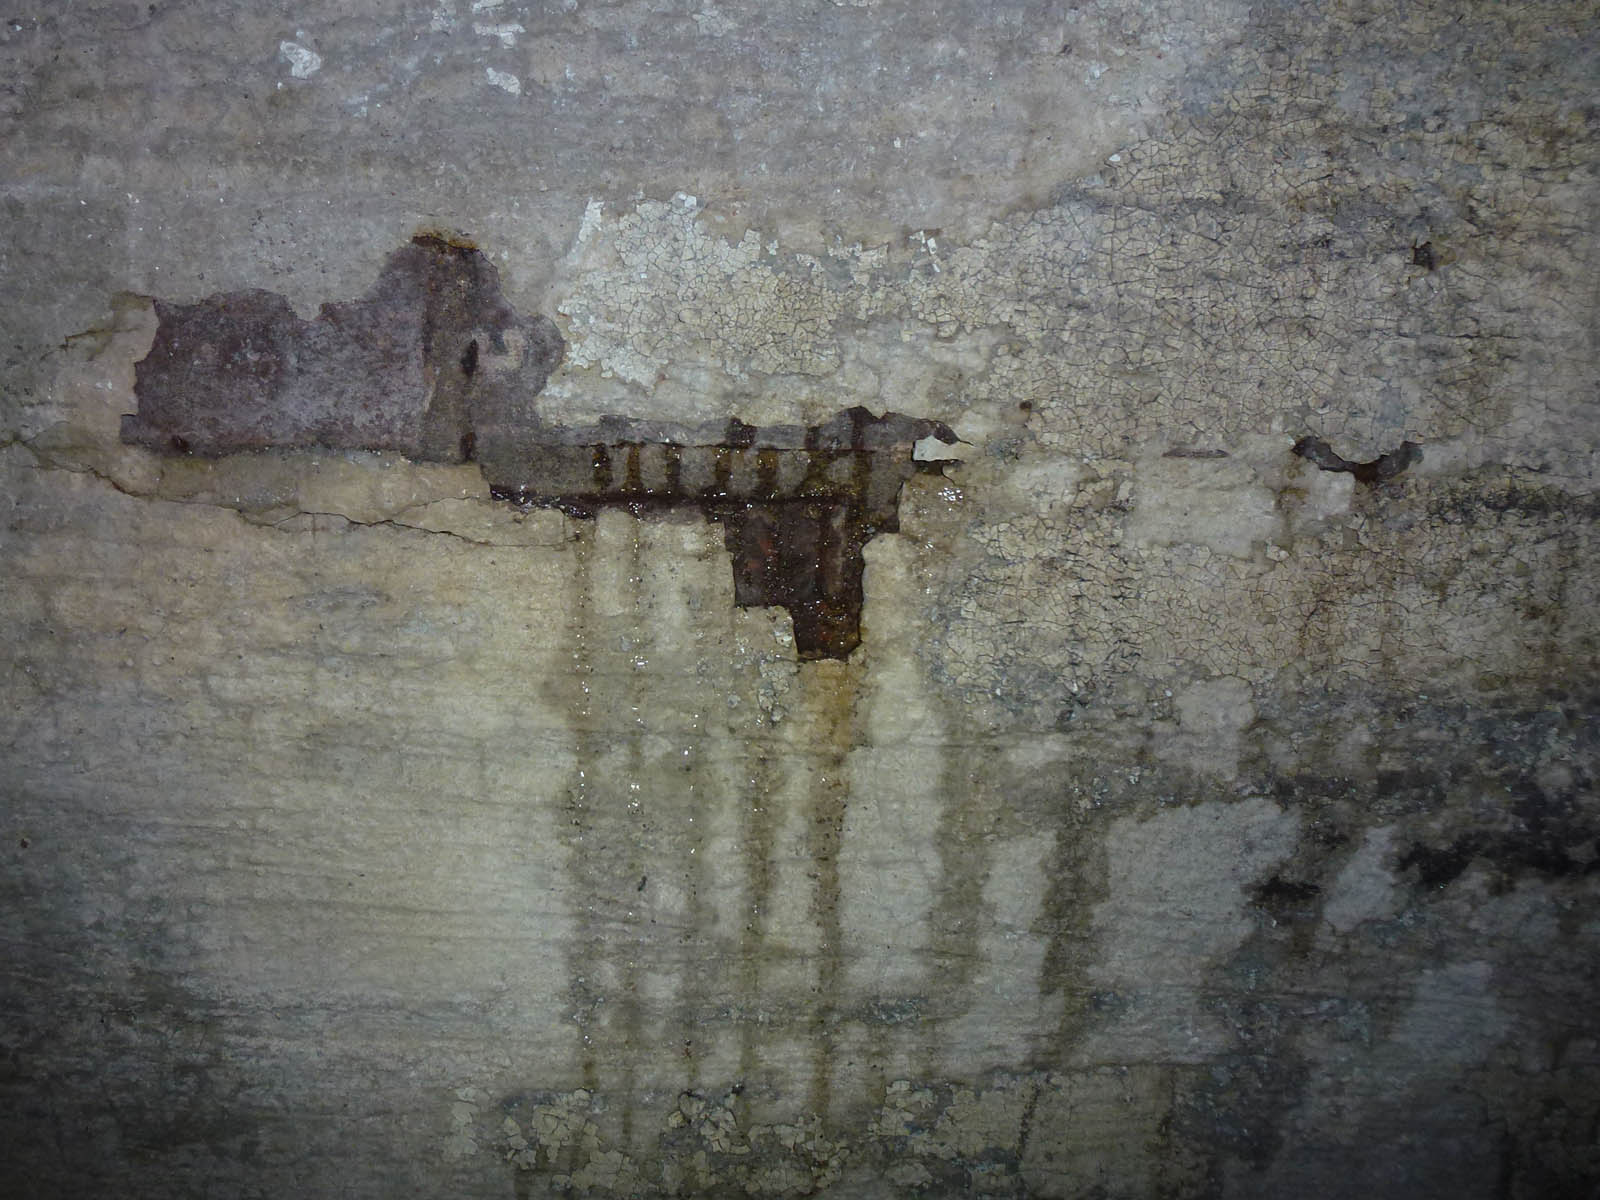
A very old heating stove… I think.
Just out of curiosity I opened a the “lid” on top of the stove. I couldn’t see inside so I shone my flashlight in there. Holy Crap! Lots of bones!

Tiny (and not so tiny) bird skeletons)
I figured all of these birds ended up there by going down our big ass chimney, then following their way down the vent pipe (visible in the upper photo) and eventually ending up in the belly of this old stove. Like a crustacean stuck in a lobster net, there was little chance of them finding their way out (particularly in 100% darkness) so it must have been a slow and sad death for all of these birds. I felt sorry for them. Some day we should cap that old chimney.

Puttin’ together pipes
Once I felt I had plenty of parts, it was time to pick & sort them, sometimes preferring a piece because of its age or uniqueness. I also test-cleaned some parts just to see how they would look with their grime and rust removed – some parts got rejected after that, AND, I was pleasantly surprised how many pieces were solid brass hidden under decades of “patina”.
Other “keep or toss” factors were whether or not I could fasten pieces together, or disassemble existing components. When these sculptures were finished, I wanted them to look like their parts belonged together, (an aesthetic decision I made: I didn’t want to weld anything…) so if I couldn’t figure out how to make new threaded connections or hide new foreign connectors, I wouldn’t use the part. Likewise – if I had a nice heavy pipe elbow, but the piece of pipe connected to it was mangled or bent, if I couldn’t carefully remove the offending bent pipe, I’d either A) figure out if I could still use the part by cutting the pipe, or B) just reject the part.

Trying to remove a bent section of pipe
This phase slowly morphed into the design phase. Actually it went back & forth. I’d clean a few parts, see if they could go together, find a different part that worked better, and so on. Each sculpture was going to need some kind of heavy base or platform, and those “shoes” I mentioned earlier would be perfect for some of them.

Holding some parts in the air to see how they’ll go together.

Some random semi-cleaned parts…
The design possibilities were also influenced by my available tools and my metal and machining capabilities. I have a nice drill press, lots of taps & dies, and I am pretty good at cutting threads, so most connections between parts would be with some kind of bolt. Ideally, I would select parts that could mate together, and fortunately, I just happened to have a large ratcheting pipe threader, (another yard sale find) so I could customize the lengths of many of the straight pipe segments. More on that later.
So eventually I worked out 8 distinctive designs, and had them drawn up in a sketchbook. The drawings were a great help – I’d work on pipes a few hours each evening, and when I got tired (or too COLD – it was 35 degrees in the shop), I could sit in our apartment going over the sketches figuring out the next steps, or if I needed any new pieces, think about improvements, etc.
While cleaning was going to be several phases, the first cleaning phase was to get rid of all of the heavy rust simply to keep everything (including myself) cleaner. I had a tool revelation during this project: “knotted wire cup brushes”, which I only happened to pick up cheap when a local hardware store was closing business. I knew about them, but never really bothered to get one and I’d always used either a wimpy brass wire wheel that you’d put in a drill, or a large wire wheel that you attach to a bench grinder.
But DAMN did those cup wheels work! You have to attach them to an angle grinder, and they’re quite mean to your skin if they get in your way, but they removed rust like nuthin’ I’ve ever seen. They took off the rust (and paint too) so much that I would wear a respirator whenever using them because they’d create an enormous cloud of rust.

A “knotted wire cup brush” kicking some rust ass
While these aren’t really a revelation – but they’ve useful to me SO many times: dental tools. They are super strong, come in all kinds of tips & shapes. I started collecting mine at flea markets over 30 years ago; now I’ve got them all organized in a giant artist’s brush folio.

Dental tool was great for removing old crusty plumber’s putty.

Before & after rust removal, and these pieces had very little rust on them.
I mentioned the pipe threader I got at a yard sale – THIS tool was a big help. It allowed me to customize lengths of pipe to either replace unusable pieces, or if the new length fit the design & shape better. The next few photos & captions describe the few steps involved.

1: Make a perpendicular cut at appropriate pipe length.

2: Use your favorite wire brush device to get down to bare metal.

3: Put it in something super strong to hold it firmly.

4: Carefully spin on the “die head” clockwise, until you feel slight resistance.

5: Attach the ratcheting handle, start pulling & threading. Add cutting oil to threads. Reverse occasionally.

6: You can see the curls of metal getting peeled away.

7: Unscrew die head and VOILA! New threads!
Okay so that’s over-simplifying it a bit, but those are still the basic steps. I cut my first threads when I was in the 7th grade (when they still had shop class in the 70’s) so it comes second nature to me.
There was also a lot of general machining, drilling & cutting involved.
Every project gets a new tool (right?), and this time I bought a metal chop saw. They’re not terribly expensive so I don’t know why I waited so long to get one. We borrowed one during our apartment construction, so I should have gone out and bought one as soon as we returned that one.

A metal chop saw saves lots of pain over a hack saw!
Of course, the chop saw doesn’t leave a neat cut in anything, so every piece that I cut needed cleanup on a grinding wheel. even if it was a little part that would be hidden. I was better off running every edge on the grinder otherwise I could cut myself on the sharp edges just by handling it.

Grinding wheel – sparks are always fun!
Every piece had from one to a dozen new bolt connections and each one of those bolt holes needed drilling first. I really put my drill press through the paces with this project – and I’m not joking here: I spent at least 12 hours standing in front of the drill press drilling holes in steel. (and aluminum.)
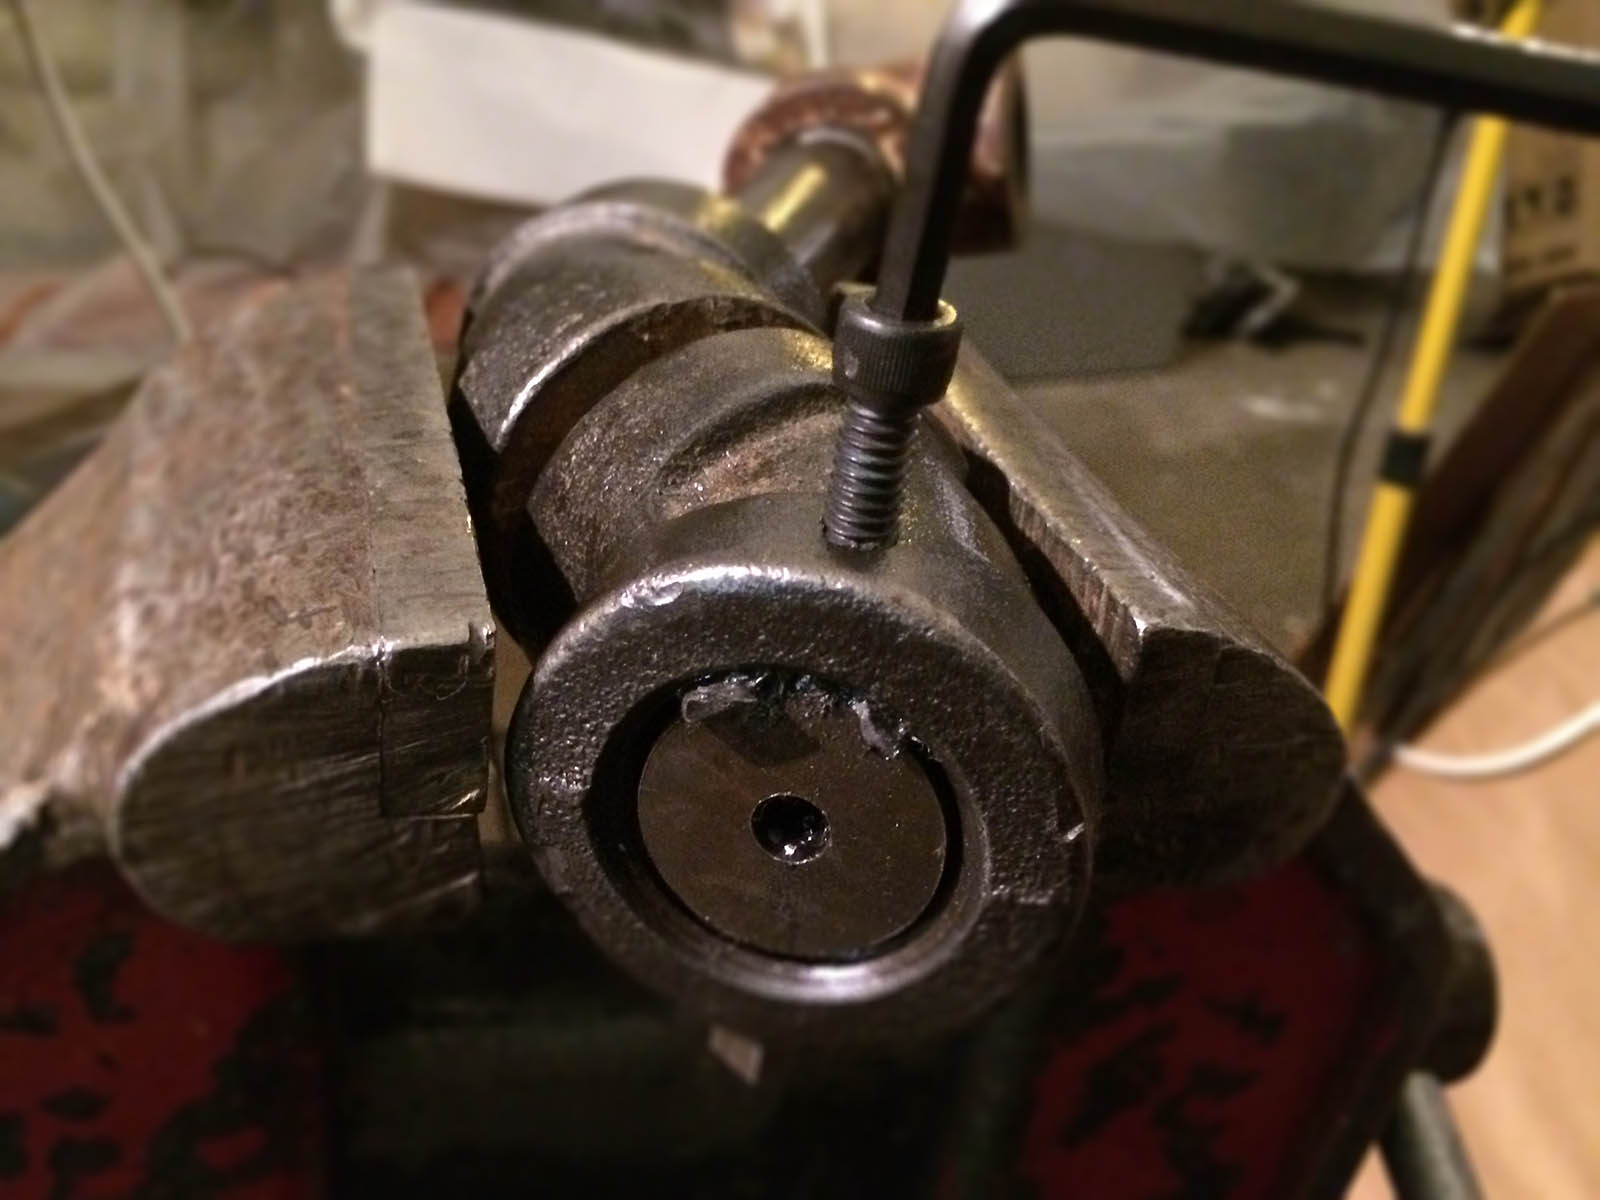
When I wanted two totally unrelated pieces to look like they were connected, I came up with this idea of using a “plug” that I made from stock steel, fastened it into one piece, then made a threaded hole in it, which I could bolt through from the other piece. (I’ll explain this more in a bit…)

Drilling a hole into a “plug” inserted into this pipe…

…which then gets threaded, for later bolt connection.
My metal work training (shop class, reading, internet) always taught me that for machining steel, cutting or machining oil should be used. So every time I drilled or threaded, I used that oil liberally. (I even bought a second bottle of it; one to keep at the drill press, the other at the metal workbench where I did most of the thread cutting.)
So any piece that needed a lot of drilling got super oily; I kept lots of rags around to keep it soaked up.

A “shoe” needing several holes got draped with oil and metal shavings.

The same “shoe” flipped over to drill larger countersink holes, to recess the bolt heads.
Needless to say, there was a lot of cutting, drilling, sometimes hand filing, of every piece of these sculptures. I wore several layers of “shop clothes” (clothes that were not to be worn in public) because it was always so cold (remember it was January/February and we don’t heat the shop) and my external layer was the “sacrificial” layer – something usually from the thrift store, and that could get super oily or nasty and I could toss it if it didn’t come clean.
“PLUGS”
So I mentioned these “plugs” I came up with to connect different pieces; I’ll go into a little detail with them because I’m interested to hear comments on what might have been an easier solution. While they didn’t need to be round; that seemed like an easy shape to fabricate (drill) and it mated nicely with the pipes they were going in.
Here’s the story…
I first went to my favorite metal salvage company, Shapiro Metal Supply, to buy some 5/8″ thick by 2″ wide metal stock; I bought a couple feet just for future use. I also found some heavy duty bi-metal hole saws; while these are typically used for wood, these claimed they’d work for metal.
I used the new metal chop saw to cut a chunk of thick steel into a manageable square. Then to the drill press.

On the drill press, cutting a new “plug” from stock steel.

After 12 minutes of steady pressure and lots of oil, a “plug”…
Each plug was going into different pipe interiors, so some slight grinding was needed on some to get the right fit. However, the plug in the next photo needed some serious tapering because of that odd connection it was going into. Lots of time on the grinder, with lots of test fits.

I made a little hook out of wire to test fit the plug, in case it jammed inside.

Finally got the plug sized right, to rest a bit below the surface.
Three of the sculpture designs needed the same kind of plug, so I went into production-line mode and made all three in the same steps. First, cut the plug; second machine them to fit inside the part; third, permanently anchor the plug from the outside… that took some patience.
I wanted the plugs centered (for ease of alignment later during assembly) and each plug needed some “shims” to keep it firmly centered. The shims held the plug in place while I drilled holes from the sides (into the plugs), which then were threaded, and finally a bolt fastened to hold the plug. The plugs had between two and four bolts each holding them in place, depending on the overall design of that sculpture.
After drilling & threading, one of the allen-head cap screws installed to hold this plug.
I used a variety of shim types from pieces of old lead wall anchors (shown in previous photo), to multiple wrappings of aluminum foil (the middle piece in the next photo), all of them meant to hold that plug in the center while I drilled the side anchor holes.

Three different pieces, each with their “plugs” now threaded.
Before I could start assembling these pieces, they needed final cleaning. This meant getting out every wire brush and small crevice tool I had to remove every last piece or rust, paint or crud. In addition to the cup wire wheel mentioned earlier, there is a flatter version, just called a “braided wire wheel” and what it’s great for is getting into crevices that the cup version isn’t so good at. (But the cup wheel is great for broad surfaces.)

Most of the parts, just before their final grunge removal.
At this point, I had all machining and cutting completed and now it was down to final touch-ups and assembly. I test-fitted each design and made sure everything was ready to go; a few grindings were necessary once in a while.
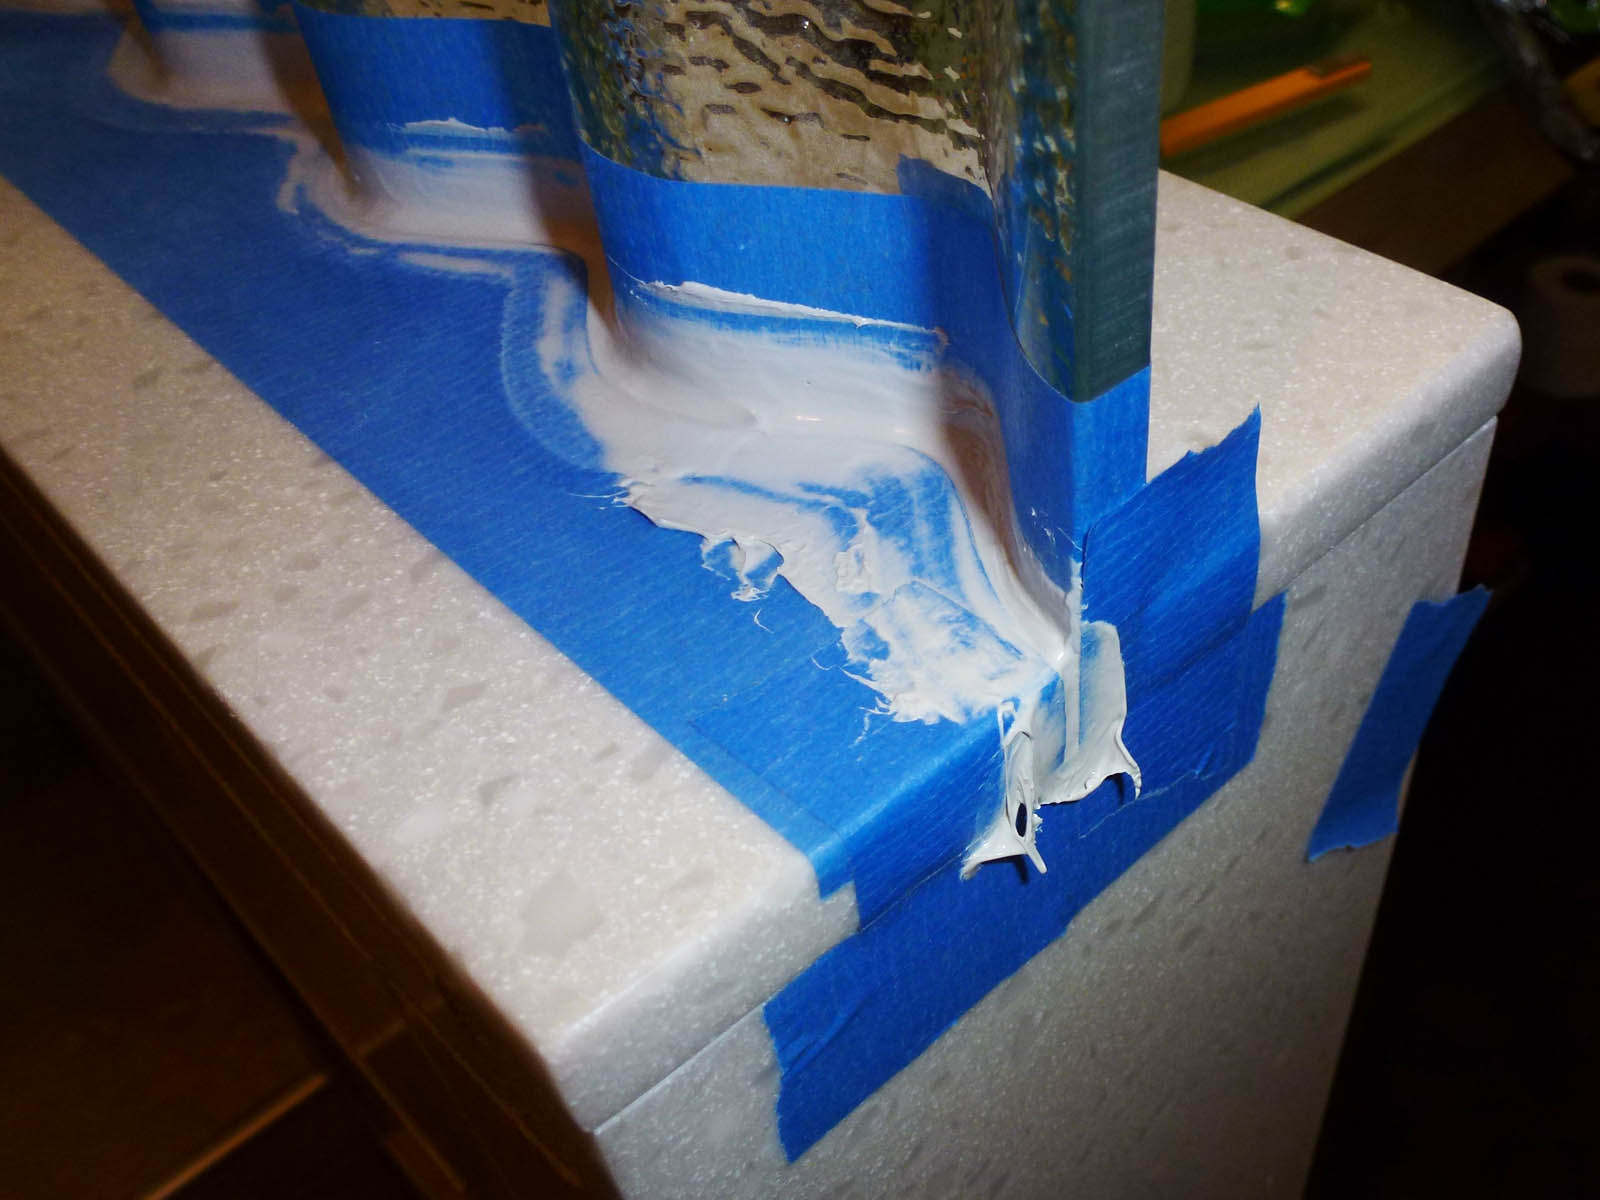
As each sculpture’s components were finalized, I dropped all of the parts into a vat of solvent to soak overnight, to dissolve the layers of cutting oil I used for drilling & threading. Otherwise the oils would be a problem for my final clear coat finish.
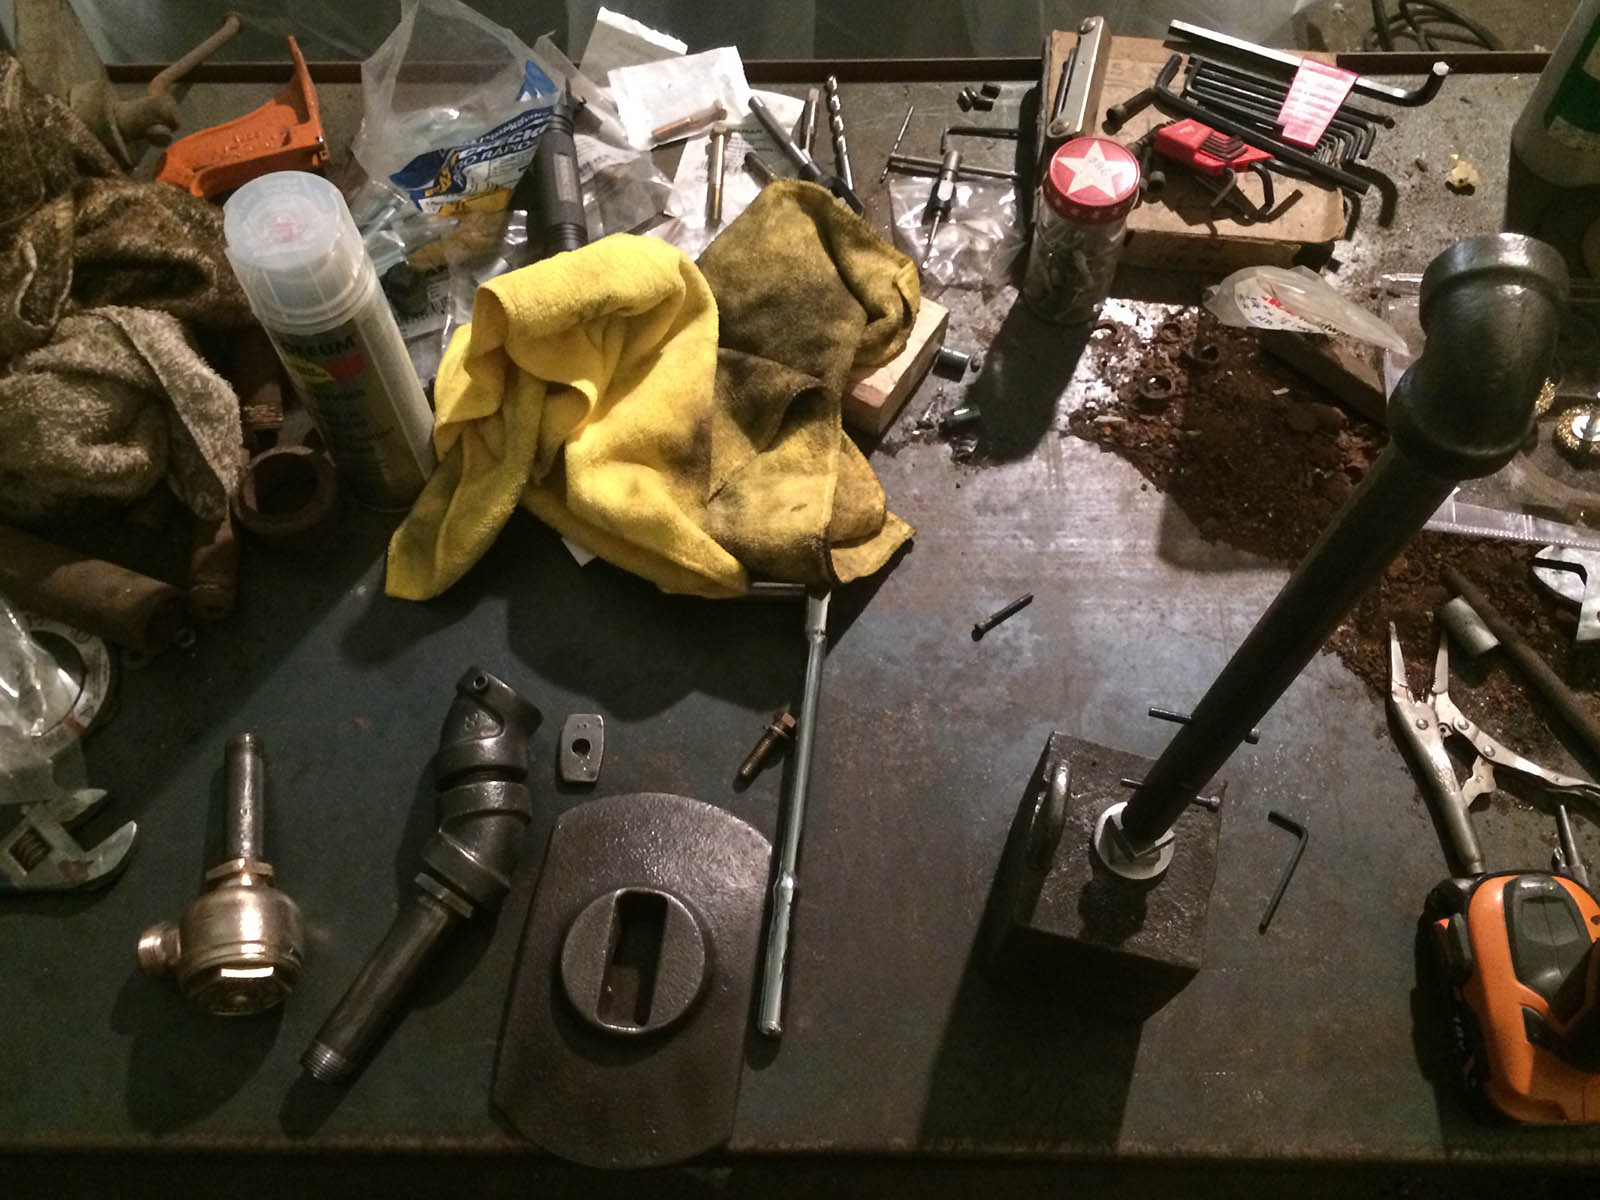
I cleared away all the crap on the workbench as the pieces got closer to completion.
I tried to keep each of the eight sculpture’s components grouped together, so when it was time for final assembly, I wouldn’t miss any single bolt or connector.

Old valve parts and a shoe, ready for assembly.
I don’t have a lot of documentation on how I cut a recess into those shoes to be able to bolt the upper pieces together, but I truly wish I did. Because it was a total pain in the ass, without have a milling machine. Instead I had to pretend that I could mill away the recessed area and just hope for the best with my drill press and Dremel tools. The next photo shows a recessed area that holds a “bar” sitting in a recess that bolts the valve to the shoe. (Sorry – I wish I had more photos of that process.)

Connecting the shoe to the main valve assembly.
Oh, I did want to mention that I also made sure that I had Grade 8 bolts for all of these connecti0ns. They are almost three times stronger than regular bolts and I wanted to crank these suckers down really hard, and have them NEVER come loose.

Here is one bunch of parts just before assembly…

…and here they are half completed.
Once all of these steel and brass parts were assembled, I moved them all to the almost-completed-Kodak-Room, because I’d set up a small heater there where I could make it just a few degrees warmer to make a better environment for their final clear coat finish. Which meant it was now 45 degrees instead of 35 degrees.
I gave each sculpture a couple of good coats of Rustoleum’s Commercial Grade Clear Coat finish and let them dry overnight.
One thing I’m not sure I’ve mentioned – instead of these eight pieces just being “sculptures”, they would also be candle holders. So at least they would have SOME functional use. I knew this all along but forgot to document.
Each sculpture had an embedded large bolt at the top to hold a candle-holding device. Originally I thought this would be just a thick flat disc of metal, like brass, but then fate intervened.
Just happened to be that my favorite commercial auction house (BCL Auctions) was closing out a medical supply company over in Illinois, and I’d just happened to have purchased about a hundred small oxygen tanks. (Right about now you should be thinking: “Tom, what the hell were you going to do with a hundred oxygen tanks?”. Well, I thought they could make cool pendant lights at least, or who knows.) Anyways they were less than a dollar a piece so it was a small investment.
But then this V.D.D. project comes along and I could make use of SOME of these oxygen tanks, by cutting off their bottoms and using them as a kind of “cup” to hold candles. (That would retain their tops for future pendant lights!)
So first step was to lop off the bottoms. Thanks to the new chop saw!

Cutting the bottom off of an oxygen tank.
Oh, in case you’re wondering, I DID check to see if the tanks had oxygen before cutting them. And several did!
After I had a bunch of cups cut off, then I needed to drill holes into their centers.

You can see where I marked, and then center-punched, the center of the cup.
After each cup had its pilot hole drilled, then it was on to the workbench to get threaded. Aluminum is very easy to thread, so no oil was required. It also goes fairly quickly.

Threading the aluminum cups, so that they’re removable.
The cups were designed to be removable, mainly for two reasons: 1) just to take off and bring to the candle store to make sure whatever candle purchased would fit, and 2) make for easier cleaning, in the event that a large candle melted into a big pool of wax and it needed to be pried out.
I don’t have anymore assembly or construction photos; the following photos are from after completion.

Here’s a funny little guy; brass part is an old radiator valve.
Oh, I didn’t document it well but the one of the toughest design challenges was figuring out how to connect something to that huge weight that I mentioned near the beginning of this post. I was hoping I wouldn’t have to drill & tap into the surface because the metal quality was poor – had lots of air pockets. It had a 1/2″ diameter hole through the center so that seem like a logical choice. I found a 12″ long bolt that was once part of a radiator mount bracket, and it fit both the hole in the weight and the inside of a small pipe. I had to “square up” the hole on the bottom of the weight to accept the bolt head and the bolt was held inside the pipe by a couple of small cap screws.

The nuts compress against the pipe and weight to hold everything tight.
I tried metal chisels and drills – but I could not easily machine this weight. In the end I used abrasive discs in an angle grinder to slowly cut grooves around the hole, essentially making it have squared edges.

Grooves cut around the hole for the square bolt head.
While I intended for all major components of each candlestick to be from BAB (except for bolts & such), I had to concede to fabricating one piece. The original design of one particular candlestick was meant to use a small 2″ square weight that I found in the basement as a transition between two “feet” made out of huge brackets and a 45° elbow, but I absolutely could not make the tiniest dent in the old metal. I tried for almost an hour to drill holes in the little block but eventually gave up. So I cut a new chunk of metal out of that steel I bought from Shapiro’s. (And I saved that little “super block” for future indestructible needs…)

The rectangular block in the middle was not original BAB…

This piece is all about a huge brass valve I found in the boiler room.
And to give each candlestick a little bit of jewelry or “bling”, I cut little hearts out of some scrap sheets of brass; I cut them rough-shaped on purpose so they had a little rustic nature to them. Instead of filing the raised cut edges you always get from using metal snips, I pounded them flat with a machinist’s hammer, which added a little to their rustic look. I also stamped in the initials for “Big Ass Building Valentine’s Day Dinner 2015”, and then polished them with my buffing wheel. I draped them around the candlestick with bead chain, so that they could be removed if desired.

A little piece of jewelry on each of the eight pieces.
So the final two pictures – the first is all but two on the workbench of where they were born, and surrounding them a lot of the tools used to make them, and just a small portion of the rust that came off of them. (click the photo to zoom in). And of course a few of their abandoned brother and sister parts that did not make the final cut. (Saved for future use…) The last picture is how they were all arranged as centerpieces just before the big dinner.

Six finished pieces on the metal workbench.

The final stage – all eight candlesticks as the centerpiece.
The best part was that none of our guests expected to receive one of these as a take-home-gift. They all said that it was a cool centerpiece, and I believe this group would not be surprised that we would make something like this just for ourselves.
So partway through dinner I announced that everyone got to take one home, and they should start eyeing them to figure out which one they’d like to have. We drew names to choose the picking order. Everyone was very gracious and appreciative, and there was some awe that they got to keep one of these.
Some asked how long they took to make, and my reply was always “I started three days ago…” Honestly I don’t calculate or record that, because it doesn’t matter to me in the end; all that matters is that when I create anything, I want the recipient to appreciate it. And after this dinner, I truly felt everyone appreciated these, so it was worth however much time I spent making them.


The candle holders are fabulous! I kept reading the post and looking at the “before” pictures and could not imagine how the pieces might be transformed into sculpture. Your creativity is amazing!
Warm wishes to both of you,
Brigitte
Sent from my iPad 2
>
Thank you Brigitte! The pieces only looked good in my mind; up until their final cleaning and assembly, they always looked like junk.
Such a creative and ingenious mind! Totally in awe of you and your abilities. They’re unique and beautiful……
Thanks Sis!
Tom: You are one crazy man. Any chance of getting my hands on those bird skeletons in the stove? Bird bones are typically hollow and fragile but if they are still as shown in the image we could probably work something out.
PTK
Hey PTK – Sure, I’ll give you 3 whole bird skeletons. You can pick them up when you come to get your stuff… 😉
One looked pretty large – perhaps a crow? What do you think? The one with feathers looks like a starling.
Sent you a separate email. Regarding the birds, heard to judge size but a Starling is a good bet. Crows are very smart and larger. They look quite beautiful in the stove, plus they probably have lots of great bacteria!
Tom – You are M&M. A Master-builder and a Mensch. Amazing!
A2
p.s. What’s next?
Thanks Aly! Don’t know what’s next, but I look forward to it!
Tom, this is so cool. Absolutely amazing.
Thanks Cindy – but what I really want to know if Fiebig was impressed too!?
As one of the first VDD attendees, I know you can appreciate the entire event…
Tom – Awesome work indeed – sometimes you scare me…
Jim, coming from you that means a lot. But for our readers – I need to give some perspective here; you made a motorcycle that supported its rider across the desert of Africa in the Dakar Rally, these things I made just have to stay upright and hold melted wax. I bow to YOU dude!
WOW Tom, very awesome job, building the candlesticks and doing the narrative.
Those shop classes sure paid off for you.When I was in 8th grade, we got to take apart a lawnmower engine.
Can I invite myself to next years party ? I’ll help make the future gifts !!
Thanks Rick! There is a lottery to get invited to BAB VDD 2016 so we’ll see! 😉
Did ya make a candlestick too, Rick?
I keep mine on my desk. I see it every time look up from my computer screen.
A treasure from treasured friends. 🙂
Awww thanks Nancy! It was a great evening and glad you could join us!